Using generic configuration
In most cases, even a processing-only prototype requires some configurability by the user. The respective target environments AIRC research as well as open apps allow for user specific configuration:
- In the open apps case, this can be found in the options section of the syngo system (e.g. syngo.via). The configuration settings are valid on a system level.
- In AIRC research this is part of the configuration screen in the AIRC portal. The configuration settings are valid on institution level.
The interesting configuration property for our DicomImageRotator app is of course the rotation angle. In this tutorial we will add configurability of this angle utilizing the generic config UI functionality offered by the Frontier Fusion environment.
For using the generic configuration approach, the prototype needs to be prepared to read a config JSON file from a certain directory. This directory will be provided as command line argument.
Adding generic configuration to our Prototype
Step 1: Enable the prototype to read config from JSON file
The provided example is already prepared to read the configuration of the rotation angle from a JSON file. Find the place in the source code and understand how to read the config file using the config directory provided as a command line argument.
In case the file does not exist, our examples will use a default value of 90 degrees. Developing the executable in a way that it will apply sensible defaults if the configuration file is missing will generally make it more robust. However, it is still required to specify the default value in the config object schema like shown below!
The expected config file for our prototype is quite simple:
{
  "angle": "90"
}
So we need to create a generic config form with one parameter called "angle".
Step 2: Create a new UI configuration
In the dev portal, open the application config section and switch to the "User Interface" tab. Add a new user interface configuration using the "plus" button. A wizard will appear, giving you the option to add two different UI components:
- A generic DICOM viewer for the results of your algorithm
- A configuration UI for your algorithm.
This latter is what we are interested in but we also want to try the generic viewer. So we leave all settings unchanged (all selected) and advance to the next screen.
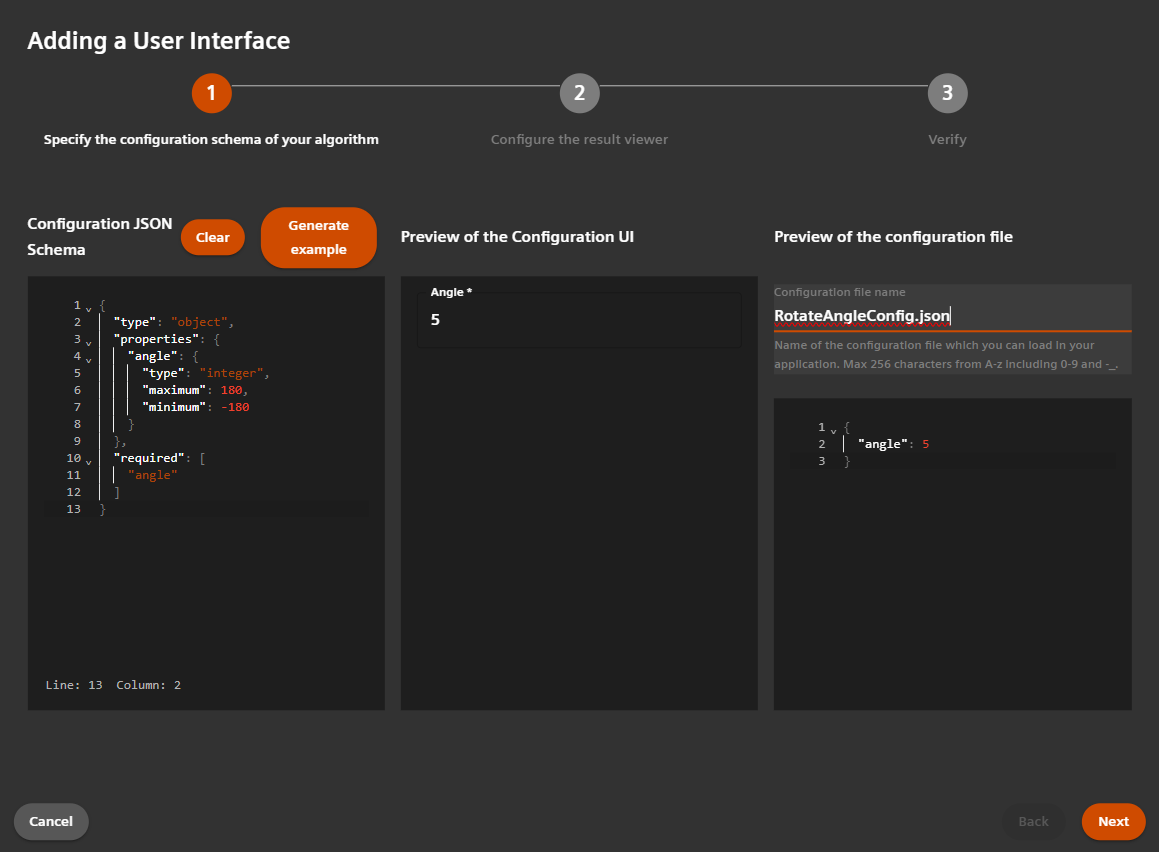
On the next screen we specify how the configuration UI should look like. It contains three columns:
The left column contains an editor for the JSON schema of the configuration object. Here we define the structure. In our case we only have one single numeric attribute named "angle". Copy the following schema definition into the editor:
{
  "type": "object",
  "properties": {
    "angle": {
      "type": "integer",
      "maximum": 180,
      "minimum": -180,
      "default": 90
    }
  },
  "required": [
    "angle"
  ]
}
This should be rather self-explanatory. Note the mandatory specification of a default value!
Additional config parameters can be added in a similar way as the "angle". Later you can try the "Generate example" button to show an example containing additional data types and controls.
In the middle column we see a preview of our configuration UI how it will look like in the respective runtime environment. It will become clear later in this tutorial. Enter some example values to better understand the functionality of this editor, e.g. enter a value outside of the allowed range.
The right column is providing a preview of the generated configuration file. The developer must provide a name of the config file which needs to match the name expected by the prototype. In our case it is "RotateAngleConfig.json". Enter this name under "Configuration file name".
Here some pseudo code how to read your config file in your backend application:
main(string[] args)
{
  // In case of zip file: The configuration parameter from processing unit settings
  // In case of container: The config mount point from processing unit settings
  var configPath = GetParams(<your_config_parameter_or_mount_point>);

  // The filename which set here
  var configFileName = "RotateAngleConfig.json";

  var fullConfigFileName = Path.Combine(configPath, configFileName);
  var config = LoadConfiguration(fullConfigFileName);
  ...
}
Now you can play with the preview in the middle column and see how the configuration object would look like in the right column. This can be helpful when implementing the consuming code in the prototype application. In other words: The prototype needs to be able to read a config object
- in exactly the shown structure,
- which has the name provided here in this form and
- which is located in the config directory provided as a command line argument.
Finally, after you have made all these changes, go to the next screen.
Here we can configure the results viewer. Chose a 1x2 layout and continue to the next screen.
Don't be confused by the terms "layout" and "hanging". Both are used interchangeable.
Review your configuration and create it.
Step 3: Redeploy
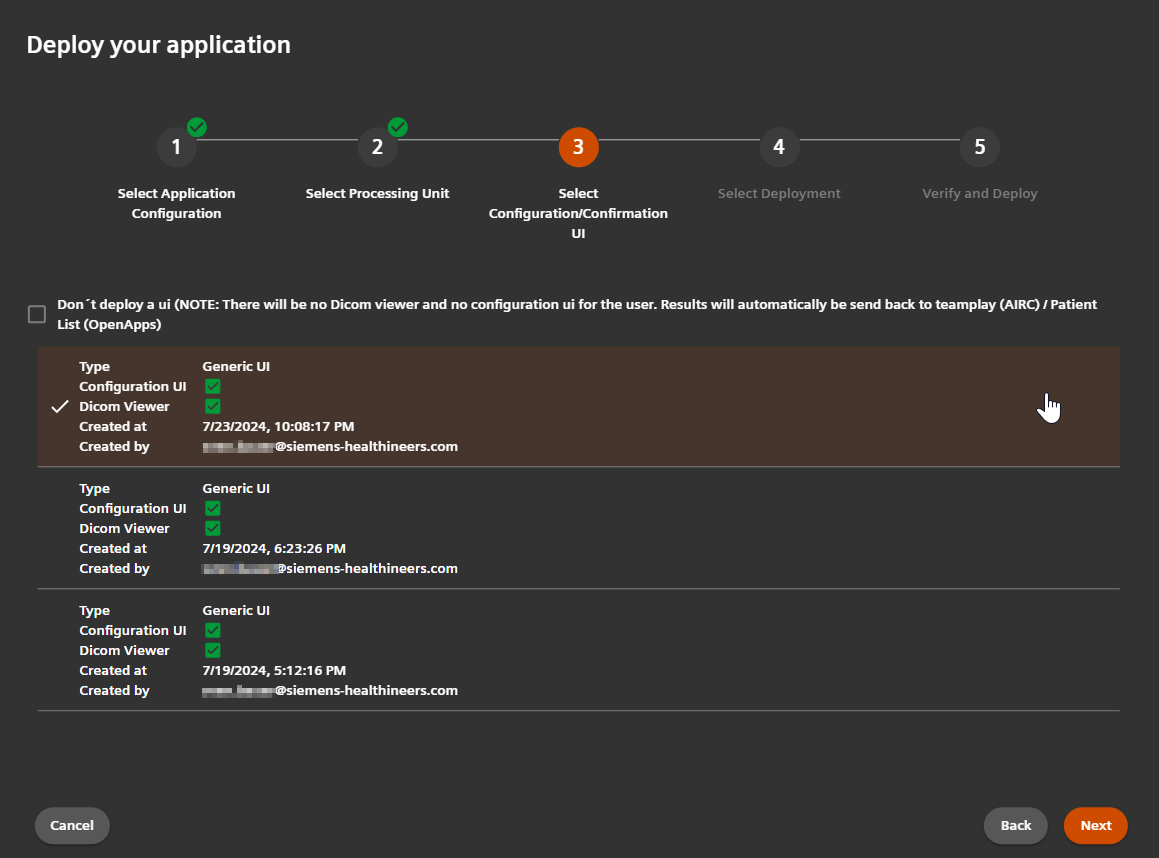
Finally we need to redeploy our application. In order to do this, go to the "Deploy" section of your application entry and add a new deployment. Perform each step in the same way as described in the previous tutorial. However, this time select the UI configuration we just created instead of selecting "no UI".

After the deployment has succeeded, the color of the button will turn from blue into green. Give it a few more extra minutes for the changes to propagate through the cluster before you go on and test it.
Step 4: Change config in AIRC portal
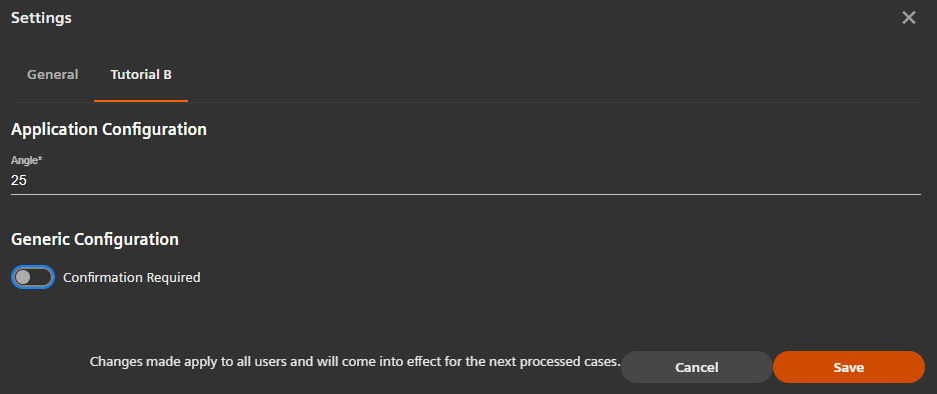
Now it is time to test the new configuration capabilities. For this we open the AIRC Research portal and select the configuration view. Afterwards we open the "Tutorial B" tab (if you gave your app a different name, you will find the tab to have this name).
At the time being you most likely need to re-enable the app after a new deployment. This is a known issue which will be fixed.
We see the form where we can configure the rotation angle. Set 25 as a value. Press "Save".

Please note that we leave the "Confirmation required" toggle unchanged, at "off". This means that the results are immediately sent back and no manual review and confirmation step is required. You can change this and repeat the test. The processed case will then appear in the AIRC "worklist" and not be sent back automatically. You can click on it and the generic viewer will open. Only if you now press "accept" the results will be sent back to teamplay.
Step 5: Test effectiveness of the config change
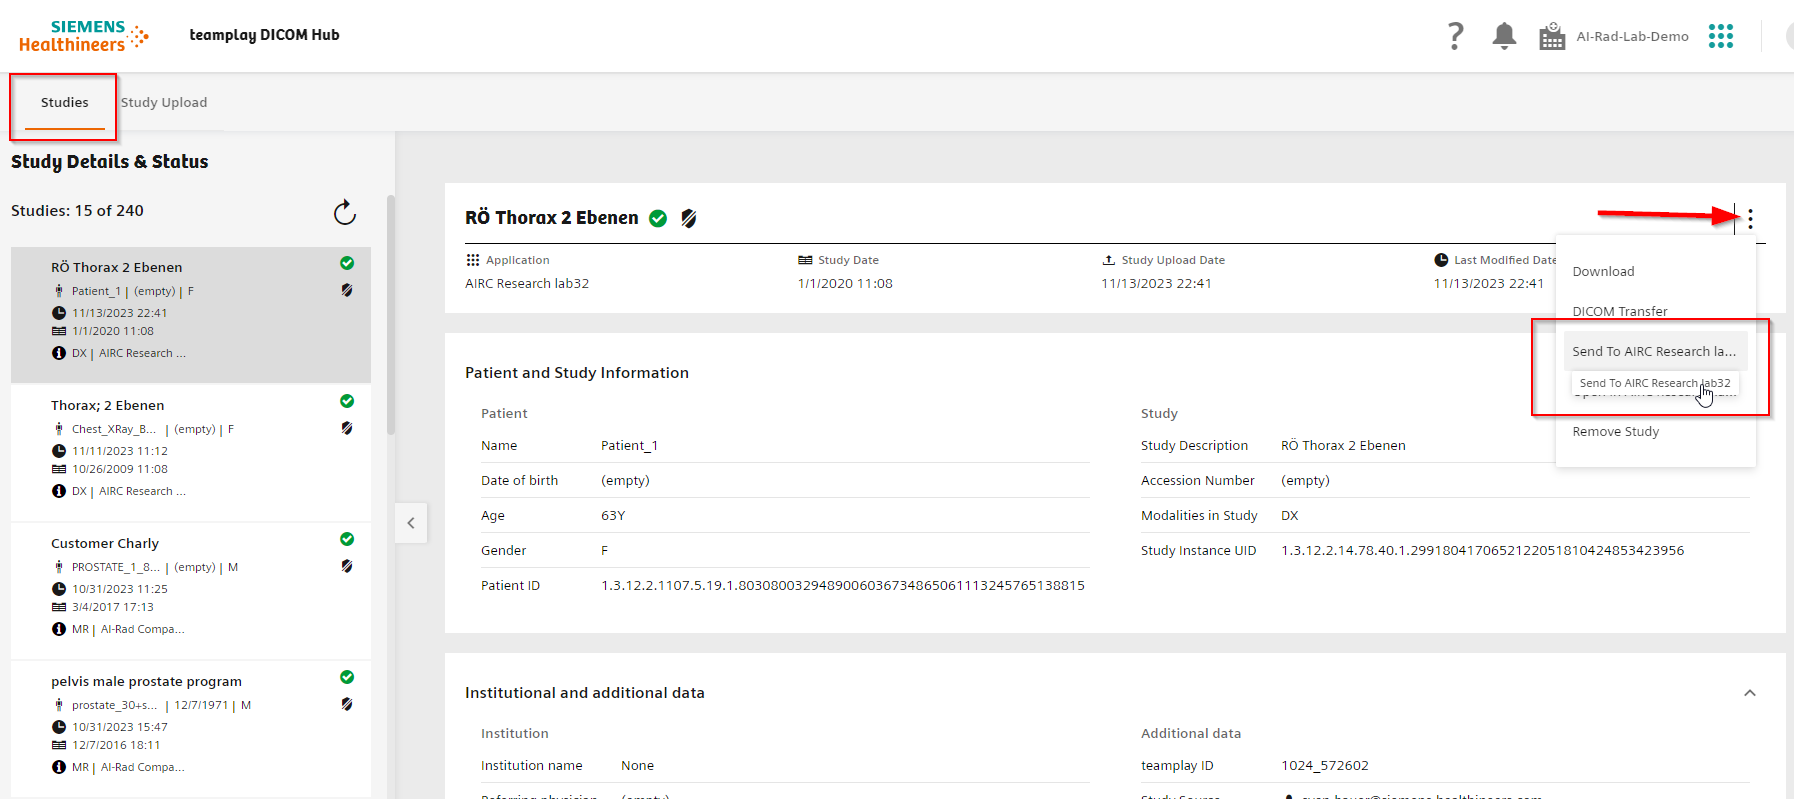
Finally we execute the prototype and check whether the config change was effective. For this we again go to the teamplay DICOM hub and send an image. We do this in exactly the same way as in the earlier tutorial Python based prototype.

After a few minutes it should finish computing and results should be sent back to teamplay DICOM hub. If needed you can check the progress in the AIRC Research UI. IF everything has worked nicely, the result should be visible in teamplay DICOM hub and it should be rotated by a 25 degree rotation angle.
