Create a linux-container application with "Monai Deploy"
In this tutorial we will show:
- How to use Monai Deploy to create a containerized application which processes DICOM images and produces output DICOM images.
1.1 MONAI framework overview
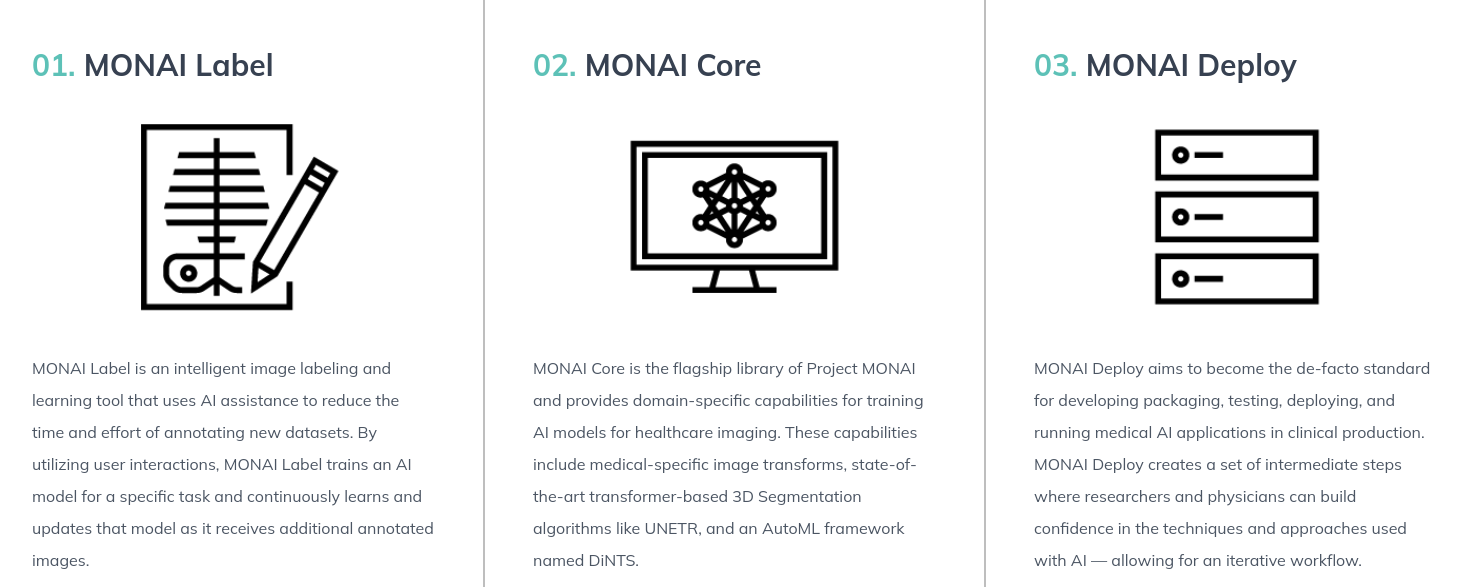
MONAI Deploy is part of an open source framework called MONAI, which provides tools for the entire Medical AI Model development workflow, from Research to Clinical Production. MONAI has important industrial support, e.g. NVIDIA, Kitware, and being built on top of Pytorch sees a significant adoption from scientific community

1.2 MONAI Deploy overview
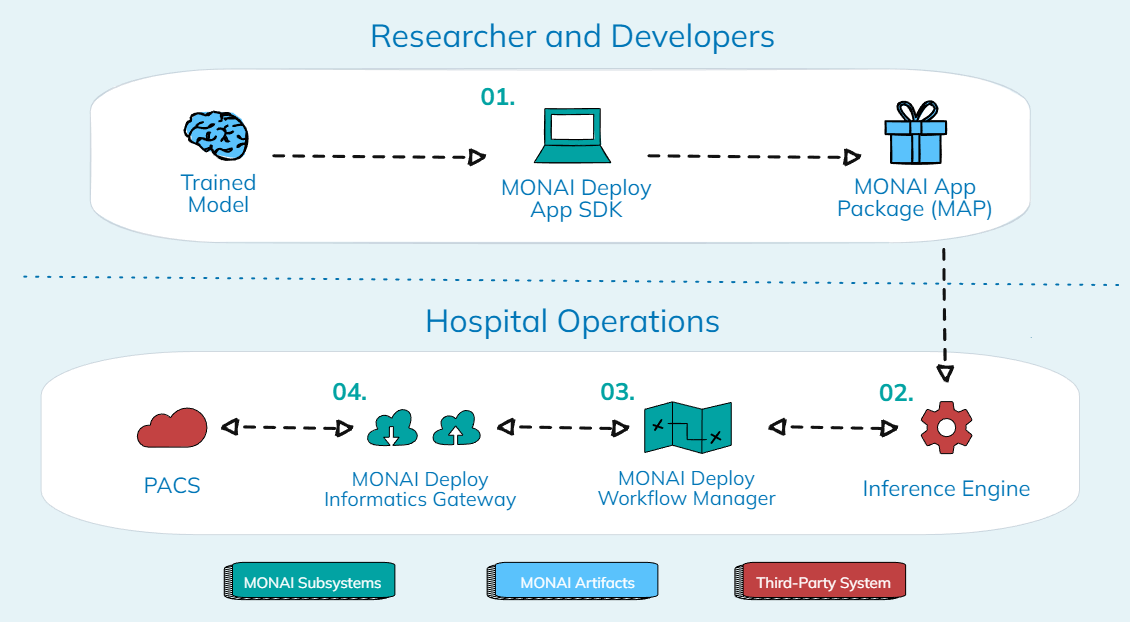
MONAI Deploy aims to become the standard for developing packaging, testing, deploying, and running medical AI applications in clinical production. It provides to the researchers and physicians a set of well-defined APIs, MONAI Deploy allows for end-to-end testing and deploying of an AI models.

2. MONAI Deploy in practise
To get the general idea, look at the MONAI Deploy homepage and documentation.
To get quickly started, MONAI Deploy provides set of example applications At the time of writing I recommend to try to get familiar with MONAI Deploy using breast density classifier app
2.1. Prerequisites
As of time of writing this tutorial, verified combination of the set up is using python-3.11 on Ubuntu 22. MONAI Deploy depends on NVIDIA Holoscan for (at least) writing DICOM results and to my experiences, latest version of MONAI Deploy works with holoscan-2.5.0. I haven't had a luck to running MONAI Deploy on Ubuntu 24 with python-3.12 and holoscan-2.7.0. I suppose MONAI Deploy wasn't yet adapted/testes thoroughly using this combination.
Create local development environment
mkdir breast_density_classifier_app
cd breast_density_classifier_app
virtualenv .venv
Clone the source code to local directory
There are multiple ways, so take your favorite one.
Install prerequisites
pip install -r requirements.txt
followed by installation of MONAI Deploy
pip install monai-deploy-app-sdk
2.2. Get model and sample data
A MONAI Application Package to deploy breast density classification algorithm is based on the Breast Density Model in developed at the Center for Augmented Intelligence in Imaging at the Mayo Clinic, Florida. Sample data and a torchscript model can be downloaded from https://drive.google.com/drive/folders/1Dryozl2MwNunpsGaFPVoaKBLkNbVM3Hu?usp=sharing Unzip the downloaded packages in the local directory, which will result in directories
ls -l *

-rw-rw-r-- 1 user user 4791 dec 19 11:23 app.py
-rw-rw-r-- 1 user user  869 dec 19 11:24 app.yaml
-rw-rw-r-- 1 user user 8143 dec 19 11:56 breast_density_classifier_operator.py
-rw-rw-r-- 1 user user  196 dec 19 11:23 __init__.py
-rw-rw-r-- 1 user user  194 dec 19 11:23 __main__.py
-rw-rw-r-- 1 user user   73 dec 19 12:03 requirements.txt

model:
total 107004
-rw-rw-r-- 1 user user 109564012 sep 20  2022 traced_ts_model.pt

__pycache__:
total 12
-rw-rw-r-- 1 user user 10001 dec 19 11:43 breast_density_classifier_operator.cpython-312.pyc

sampleDICOMs:
total 12
drwxrwxr-x 3 user user 4096 dec 19 11:40 1
drwxrwxr-x 3 user user 4096 dec 19 11:40 2
drwxrwxr-x 3 user user 4096 dec 19 11:40 3
3. How to run and deploy the app
3.1. Run the application code with Python interpreter
While you as developer are actively working on an application, you obviously need to test its functionality. This is easy to achieve by running from command line or from development environment.
python app.py -i ./sampleDICOMs/2/BI_BREAST_SCREENING_BILATERAL-2019-07-01/2 -o ./results -m ./model/traced_ts_model.pt
3.1. Package the application as a MONAI Application Package
Once your code runs smoothly, it's time to package it so that it can be deployed to its final deployment place. In order to build the MONAI App Package, go a level up and execute the following command.
cd ..
monai-deploy package breast_density_classification_app \
     -m breast_density_classification_app/model/traced_ts_model.pt \
     -c breast_density_classifer_app/app.yaml \
     --tag breast_density:0.1.0 --platform x64-workstation -l DEBUG
The above command will create a regular docker image, which you can check using traditional way:
docker image ls
REPOSITORY                                          TAG         IMAGE ID       CREATED      SIZE
breast-density-x86-workstation-dgpu-linux-amd64     latest      ea62359465c6   1 minute ago 17.9GB
3.2. Run the MONAI Application Package using MONAI Deploy CLI
monai-deploy run breast_density-x64-workstation-dgpu-linux-amd64:0.1.0 \
     -i breast_density_classifier_app/sampleDICOMs/2/BI_BREAST_SCREENING_BILATERAL-2019-07-01/2 \
     -o breast_density_classifier_app/results
Once the container exits successfully, check the results in the output directory. There should be a newly creeated
DICOM instance file and a output.json file containing the classification results.
3.3. Run the MONAI Application Package using docker run CLI
The great thing is, as mentioned above that the monai-deploy package command creates a reqular docker image, which can be executed by docker run.
cd breast_density_classifier_app
docker run -v ./breast_density_classifier_app:/data breast-density-x86-workstation-dgpu-linux-amd64:latest \
           --input /data --output /data/results
The docker image can be packaged to a file and transferred to its final deployment, which could be a regular PC, cloud, or other friendly platform, such as syngo.via OpenApps:
docker save -o breast-density-x86-workstation-dgpu-linux-amd64.tar ea62359465c6
4. Brief description of MONAI Application (MAP) implementation
4.1. app.py
This would be a minimalistic MAP
import logging
from pathlib import Path

from my_operators import MyOperator
from monai.deploy.core import AppContext, Application

class MyApp(Application):
    """This is an example AI application."""

    def __init__(self, *args, **kwargs):
        self._logger = logging.getLogger("{}.{}".format(__name__, type(self).__name__))
        super().__init__(*args, **kwargs)

    def compose(self):
        """Creates the app specific operators and chain them up in the processing DAG."""
        self._logger.info(f"Begin {self.compose.__name__}")

        # Use command line options over environment variables to init context.
        app_context: AppContext = Application.init_app_context(self.argv)
        app_input_path = Path(app_context.input_path)
        app_output_path = Path(app_context.output_path)
        model_path = Path(app_context.model_path)