Self-onboarding of a Python-based "processing-only" application
In this tutorial we will show how to onboard a Python-based processing-only prototype onto the "AIRC Research" prototyping environment. For this purpose we will use a simple example and show each step required to have it running in "AIRC Research" as well as in "Open Apps".
For some general background on how to develop Frontier Fusion prototypes please see Application Deployment Guide.
Our example uses Python as a popular language for AI driven applications. However, during the tutorial it will become clear how to onboard any prototype that adheres to the boundary conditions described here, not just Python...
In this example we will use a prototype that is processing-only. Hence, no UI parts (for configuration as well as viewing/confirming results) need to be developed and onboarded. Obviously, this is the most simple kind of prototype and many real-world prototypes will at least require a configuration UI. However, for the sake of simplicity we leave this out in this example. There will be more examples and tutorials which will demonstrate the UI aspects. In particular the next tutorial is showing how to extend this example with a generic configuration UI without the need for programming.
Python scripts
Python scripts are per se no windows executables. As described in Application Deployment Guide the Frontier developer portal currently only allows to onboard Windows executables. In this guide we are showing an easy way to create a self-contained Windows executable from a Python script. Afterwards we will onboard this executable using the Frontier developer portal.
The example itself is rather simplistic and only performs an image rotation by a configured angle. It is primarily used to demonstrate how to read input and configuration data, perform some processing and store the results. While this part will be similar in a real prototype, the processing part obviously needs to be replaced with the real processing.
As this example is very basic, it uses only a small number of modules/libraries (e.g. numpy). For more realistic prototypes a larger variety of modules/libraries will be used (e.g. PyTorch). Please be aware that this could lead to technical issues not covered in this example. However, the general principle should still apply.
The example: DicomImageRotator
Overview
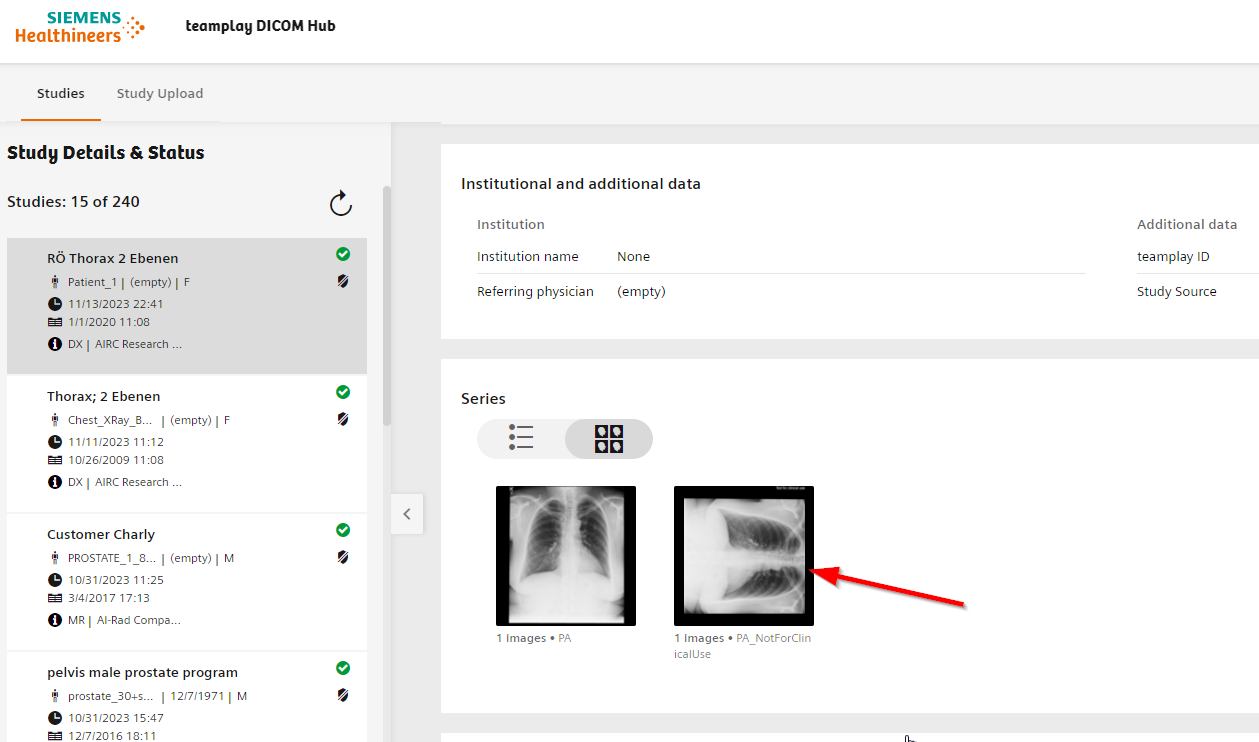
'DicomImageRotator' is a non-interactive python windows application that accepts command-line arguments. It reads the DICOM images provided in the source folder and rotates DICOM images with an angle provided in the configuration file. Rotation angle by default is 90 degrees. Rotated images are then saved in the output folder.
The following image shows an example processed with this script (in the teamplay DICOM hub UI):
Project Structure
The source code of the example is available here.
The files are structured in the following way:
\---PythonWinApp
    |
    \---DicomImageRotator
        | DicomImageRotator.py --> Entry-point script
        | DicomImageRotator.spec
        | README.md
        |
        \---ImageRotator
                RotateImage.py
                __main__.py
    \---config
        | RotateAngleConfig.json
    \---in
        | sample_xray.dcm
    \---out
    \---log
Application usage
To get a feeling for what the example app does and to test it before deploying, navigate to the top-level folder of the downloaded example ("PythonWinApp") and execute the script locally.
Prerequisites
- Python needs to be installed (tutorial based on version 3.11.0)
- check with
python --version
- check with
- For running the script, the used packages need to be installed:
pip install numpypip install scipypip install pydicompip install pyhton-gdcm
- For creating the standalone Windows executable from the python script, we are using PyInstaller:
pip install pyinstaller
Local execution
The script accepts the following command line arguments:
- "-i": The input directory. Contains an example DICOM image.
- "-o": The results directory (empty)
- "-l": The log directory (empty)
- "-c": The config directory. Contains a example configuration. Play around with it.
The respective directories have been prepared and are part of the ZIP file.
Execute the following command line:
python DicomImageRotator\DicomImageRotator.py -i .\in -o .\out -l .\log -c .\config
Check the output directory.
Now you have your prototype ready. In the next chapter we will show a step-by-step tutorial of the onboarding procedure.
The onboarding steps:
Step 1: Create Windows executable
Spec file
Pyinstaller builds the app by executing the contents of the spec file.
For example, DicomImageRotator.spec file tells pyinstaller how to process our script. Below excerpt from the spec file resolves the hidden import of pydicom module so that pyinstaller can include ‘pydicom’ package as part of executable.
# -*- mode: python ; coding: utf-8 -*-
from PyInstaller.utils.hooks import collect_submodules
hiddenimports = []
hiddenimports += collect_submodules('pydicom')
Using PyInstaller
To create the executable, cd to the top-level directory (i.e. PythonWinApp) and run PyInstaller with the spec file
pyinstaller DicomImageRotator\DicomImageRotator.spec
This will create a build and a dist folder in our top-level directory. The folder .\dist\DicomImageRotator contains all the dependencies and the executable. This folder should be self-contained and "XCOPY-deployable" to another Windows machine.
Step 2: Test executable locally
Just like with the original Python script, we can now execute the generated executable to test it locally. We use the same folders as above:
.\dist\DicomImageRotator\DicomImageRotator.exe -i .\in -o .\out -l .\log -c .\config
This step is crucial: When testing the executable locally you are making sure that it is self-contained and includes all required libraries. Obviously, local testing provides much more possibilities for analyzing potential problems than performing these tests only after onboarding. Ideally, do these tests even on a different machine to uncover potential hidden dependencies.
Step 3: Package executable into ZIP file
Add the entire content of the generated .\dist\DicomImageRotator\ directory to a ZIP archive. Please absolutely make sure that the entire content of said directory (incl. the actual executable) is on root-folder level of this ZIP archive. It is a common mistake that the ZIP is created with an additional root folder, e.g. the DicomImageRotator folder itself. This will lead to the runtime not finding our executable.
Step 4: DevPortal: Create new app
Go to the "Applications" tab in the dev portal. Create a new application in the dev portal by pressing the add new button.
The following dialog will be shown:
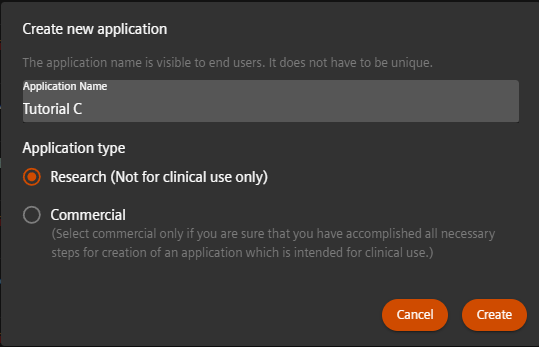
The application name will be used in the dev portal but also in the final deployment to identify the prototype on the UI.
Step 5: DevPortal: Configure new app
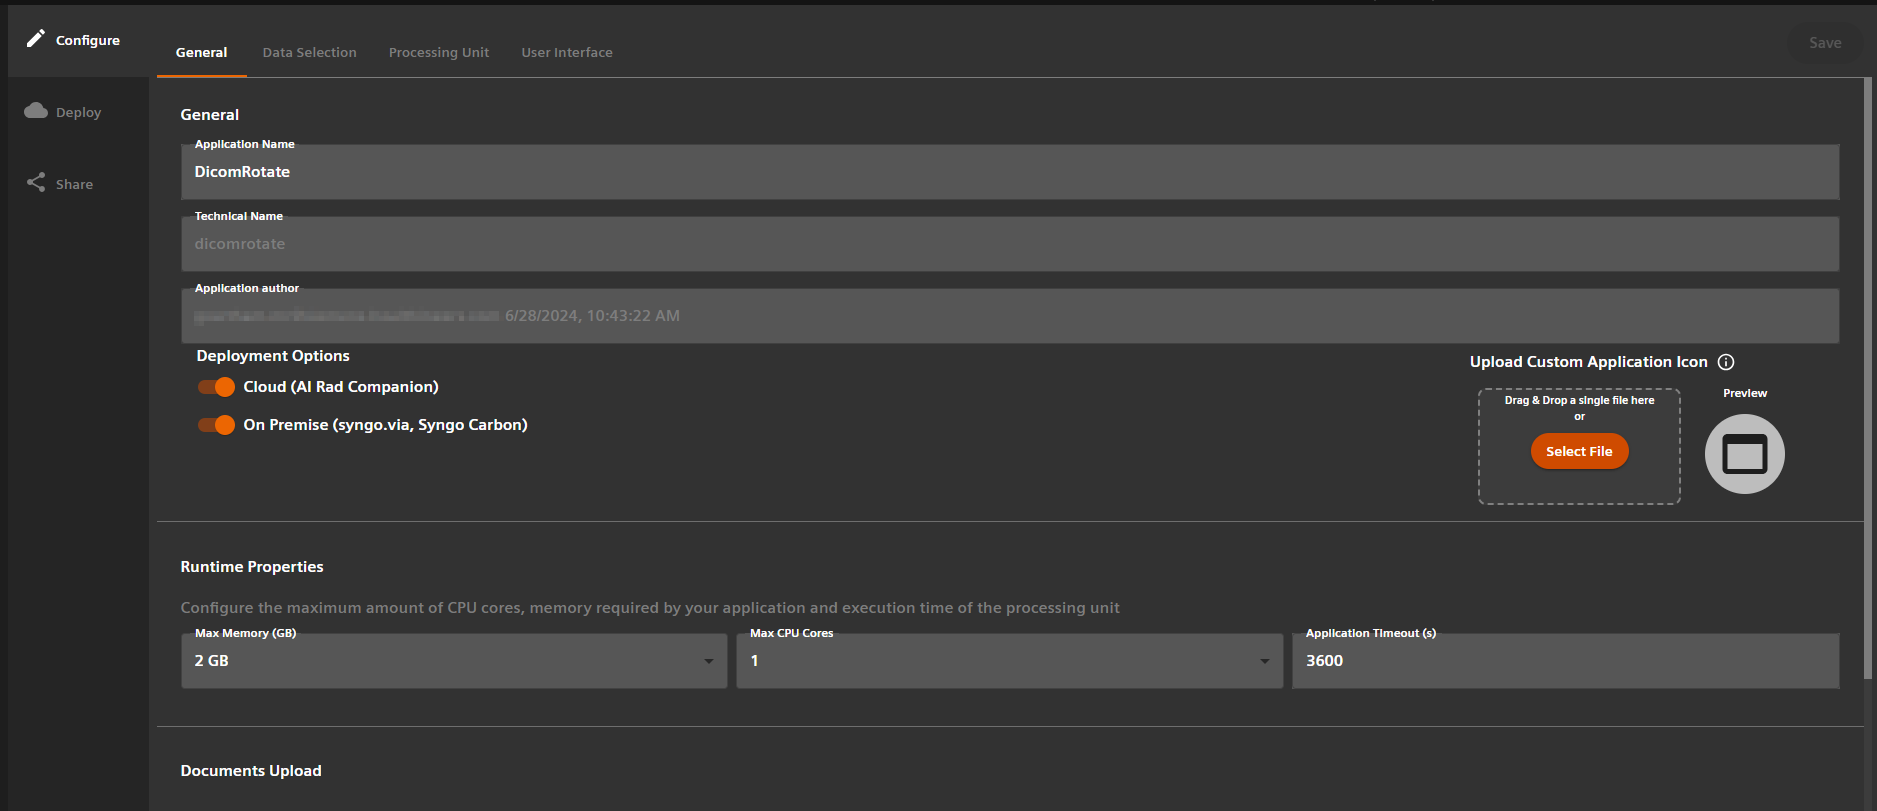
After creation of the application we need to provide more detailed configuration metadata, create deployable artifacts and finally deploy those to the target runtime environment. The respective screen is automatically shown after creation. These steps are done in the following screen split into two tabs, which we will navigate through in this tutorial. You can always come back to this screen by clicking the application in the application list.
The first tab is the configuration screen. We can leave all configurations with the default settings:
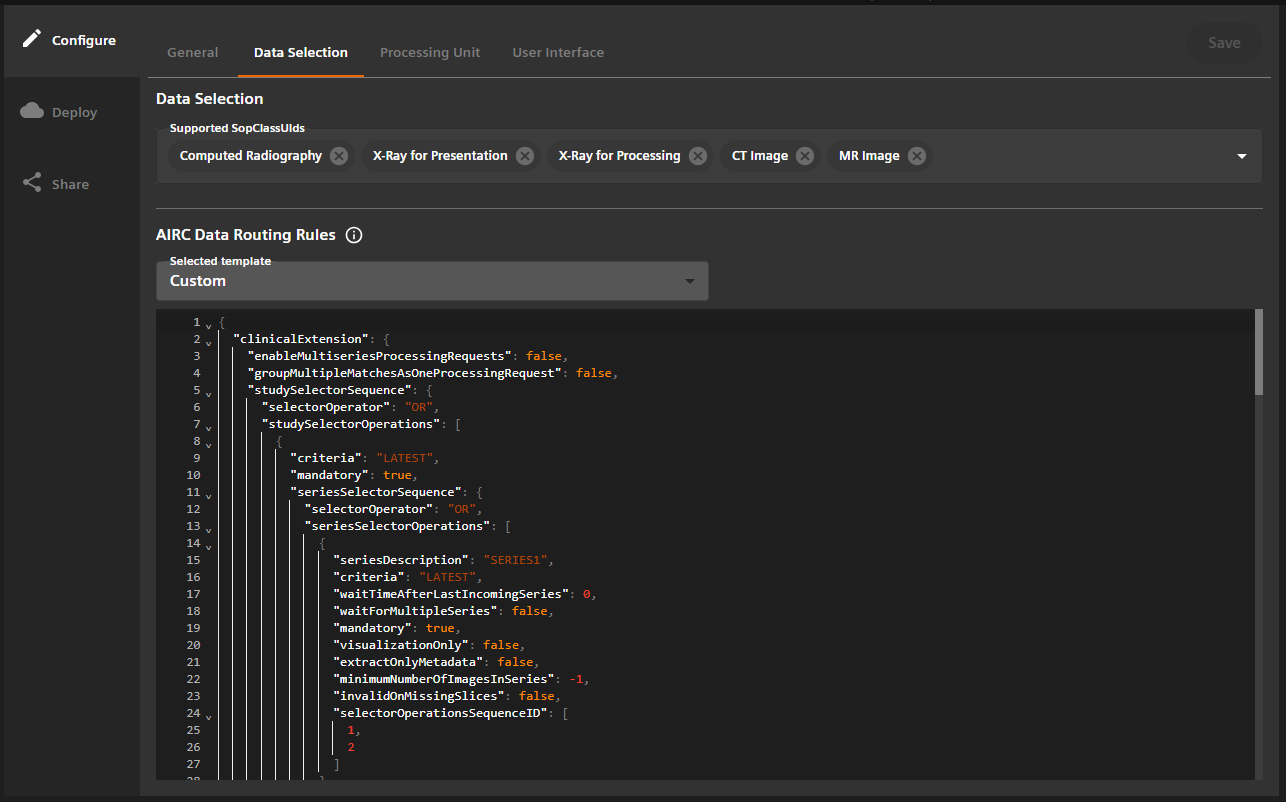
In the dataSelection part of configuration we need to choose default accepted Data types for this tutorial choose:
CR, X-Ray For Presentation and Processing, CT and MR images.
Do not forget to press the "Save" button in the top right corner.
Step 6: DevPortal: Upload processing Unit
After completion of the configuration we go to the next step, i.e. the next tab: "Processing Unit".
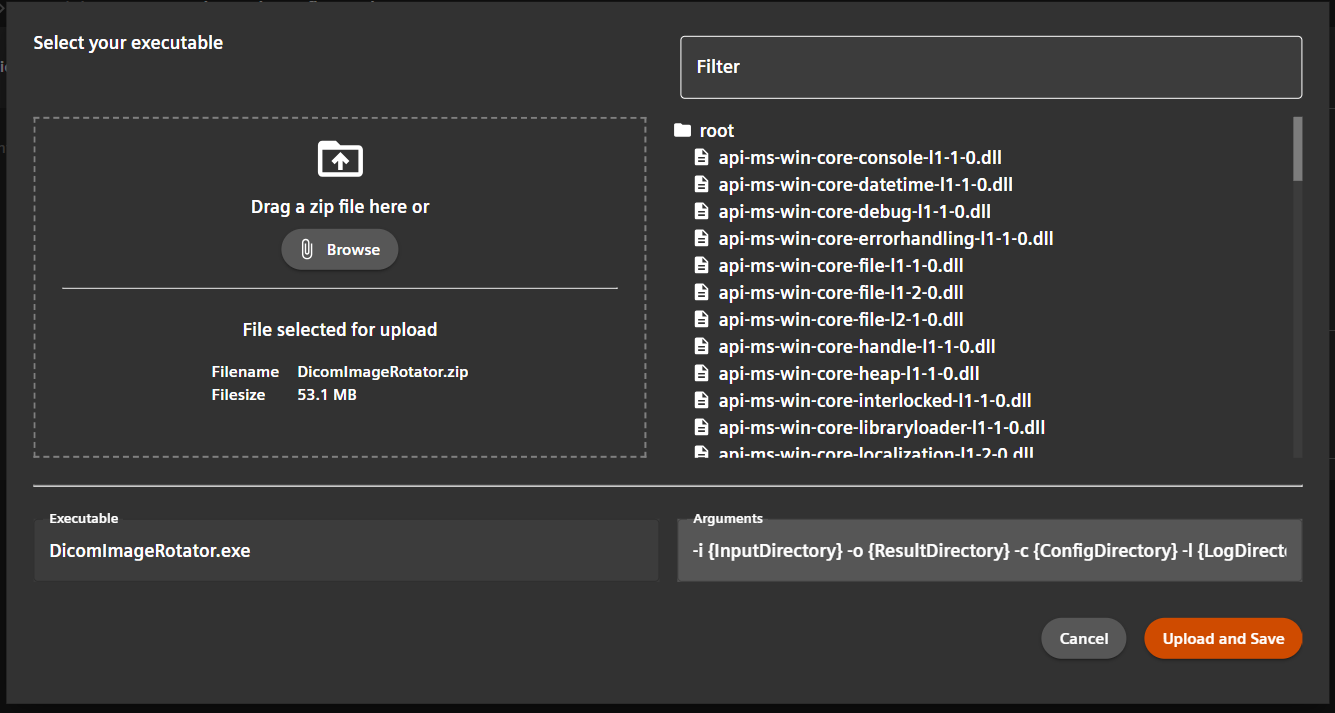
Click the Add new button in the lower right corner and then select ZipFile.
Next upload provided ZIP file via selecting it in browse button or by moving him into upload selector.
After successful selection of file choose in the right side window DicomImageRotator.exe file, you can also search for this file in the top filter, after its selection its path should be in the Executable field, afterwards Change executable arguments to:
-i {InputDirectory} -o {ResultDirectory} -c {ConfigDirectory} -l {LogDirectory}
And click Upload and Save.
Note that the tokens described in Application Deployment Guide are used in this command line. This example does not support re-processing. Hence, the {IntermediateDirectory} token is not used.
Step 7: DevPortal: Deploy to target environment
The final step is to perform the actual deployment of the created deployment artifacts. This is where the two different deployments "Open Apps" and "AI Rad Companion Research" require different user actions.
AIRC and Open Apps Deployments
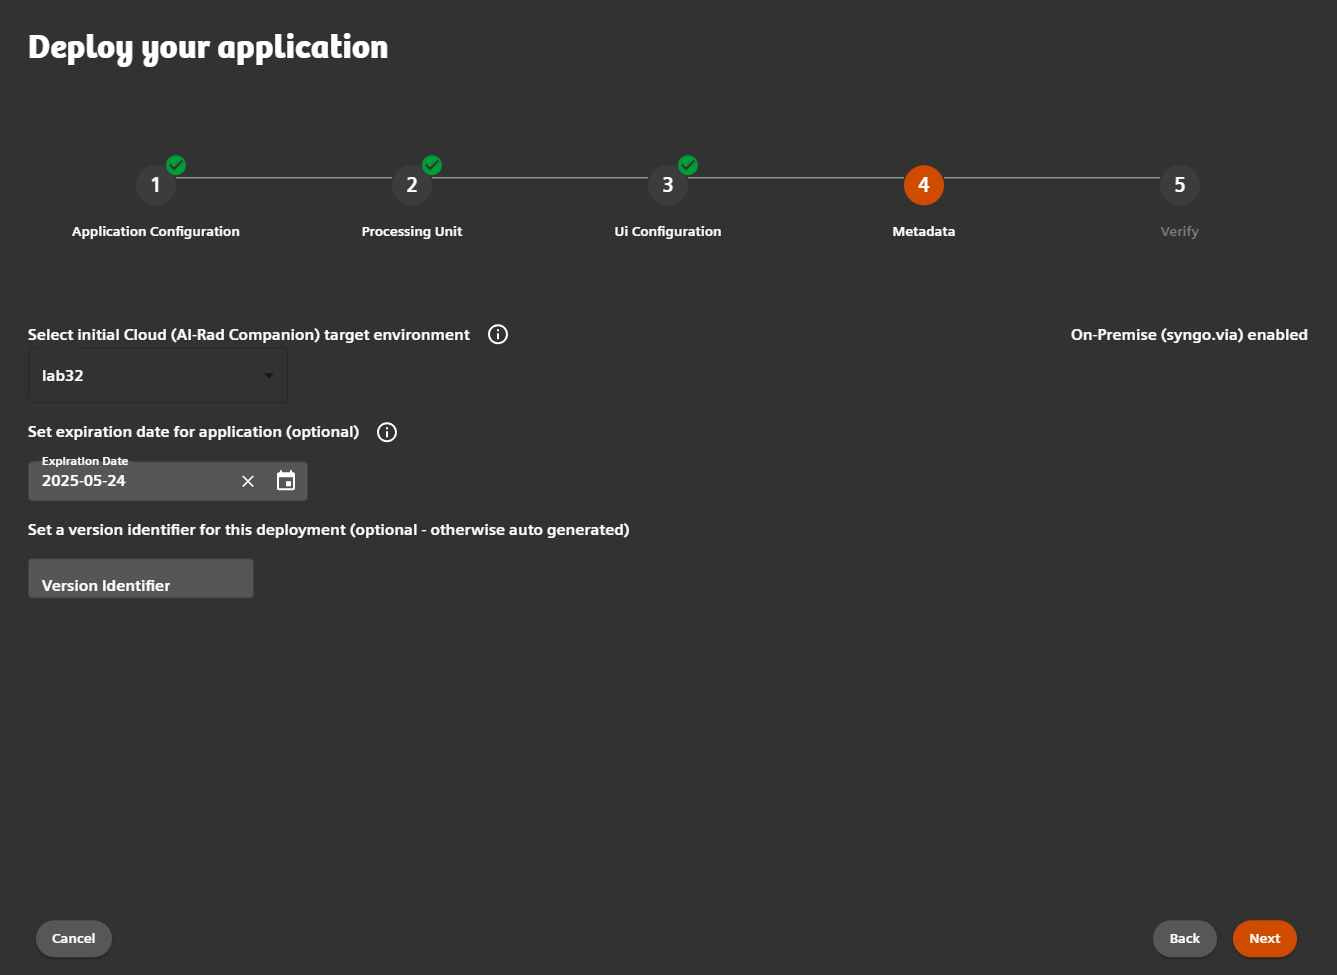
The deployment into the AIRC Research or Open Apps environment can be achieved using the second tab of the applications details screen: "Deployments" the target environment is based on configuration. If this is the first deployment expect the list to be empty. Click the Add new button to add a new deployment:
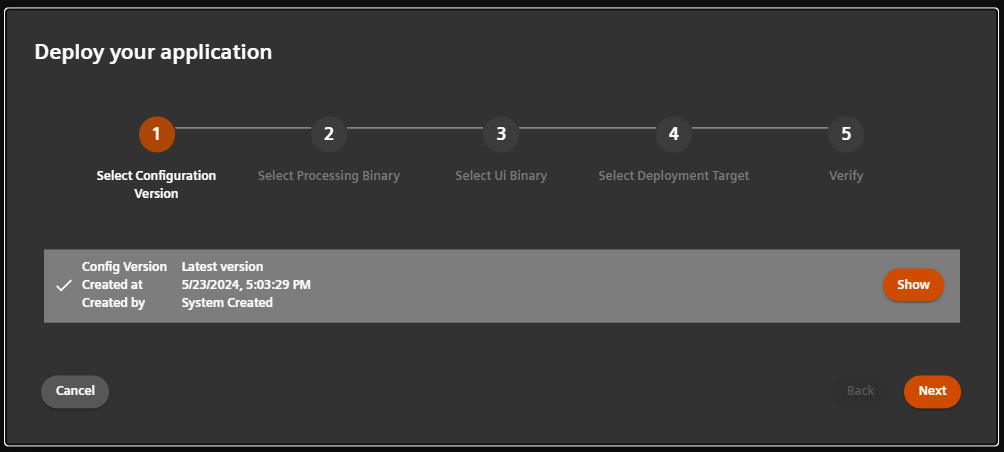
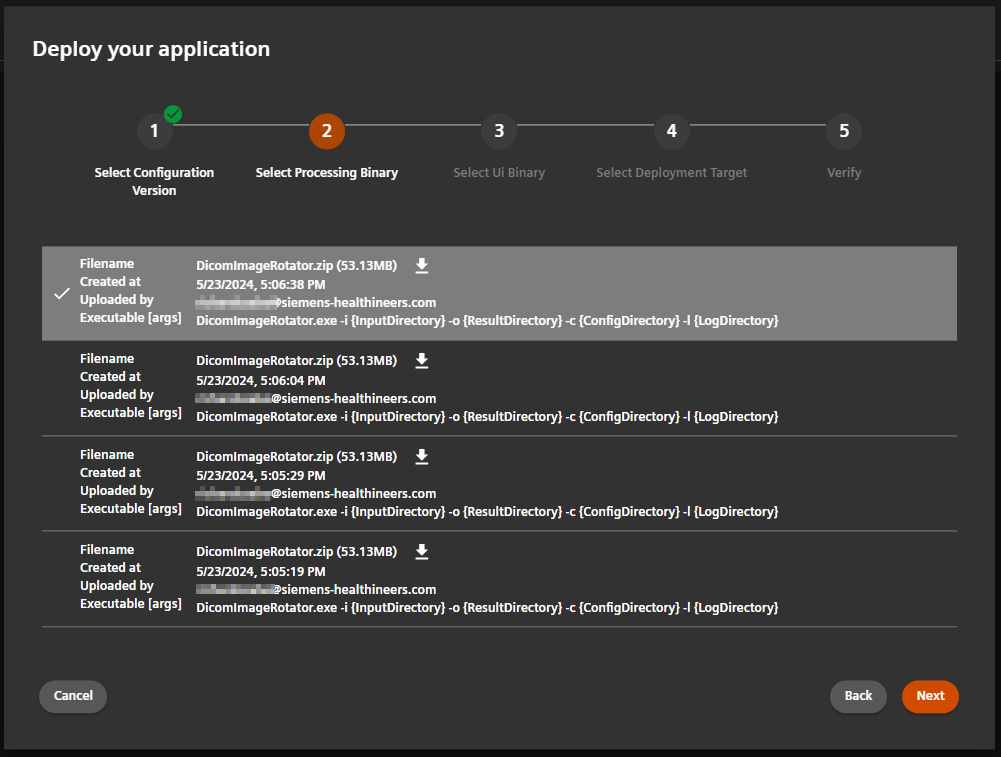
Give it some time for the deployment to finish. You can leave the page and come back later. Successful deployment will be indicated by a green "airc-lab32" button.
Open Apps
For OpenApps there will be a possibility to push the generated deployment artifact ("OAF" file) directly to the respective marketplace. However, this is still under development. Therefore we are offering to download the generated OAF file. Afterwards, this OAF file can be installed on a "syngo.via" system of your choice (or any Open-Apps-capable system, for that matter) using a simple install wizard.
For directly downloading the generated OAF file click the "Download Artifact" button. However, in some cases it can be more convenient to download the OAF file directly onto the system where it needs to be installed. For this purpose we also offer to copy the download link ("copy" button) and execute it on the target system. The link has a validity of 30 minutes and both options are provided in OpenApps button... [TODO: Check if 30 mins is correct!]:#
Step 8: Check deployed app appears in "AIRC Research"
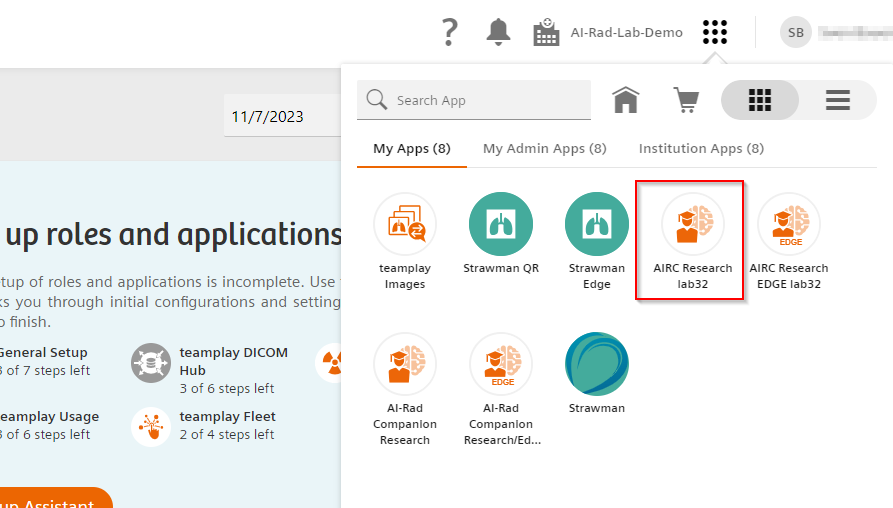
After successful deployment to AIRC Research, we check if the prototype is visible in the AIRC Research "General Configuration" section. For this purpose we need to login to the teamplay Sandbox environment. Select an institution that has access to AIRC Research Frontier prototypes and open the "AIRC Research lab32" application (subject to change!):
Open the configuration and check the "General" section:
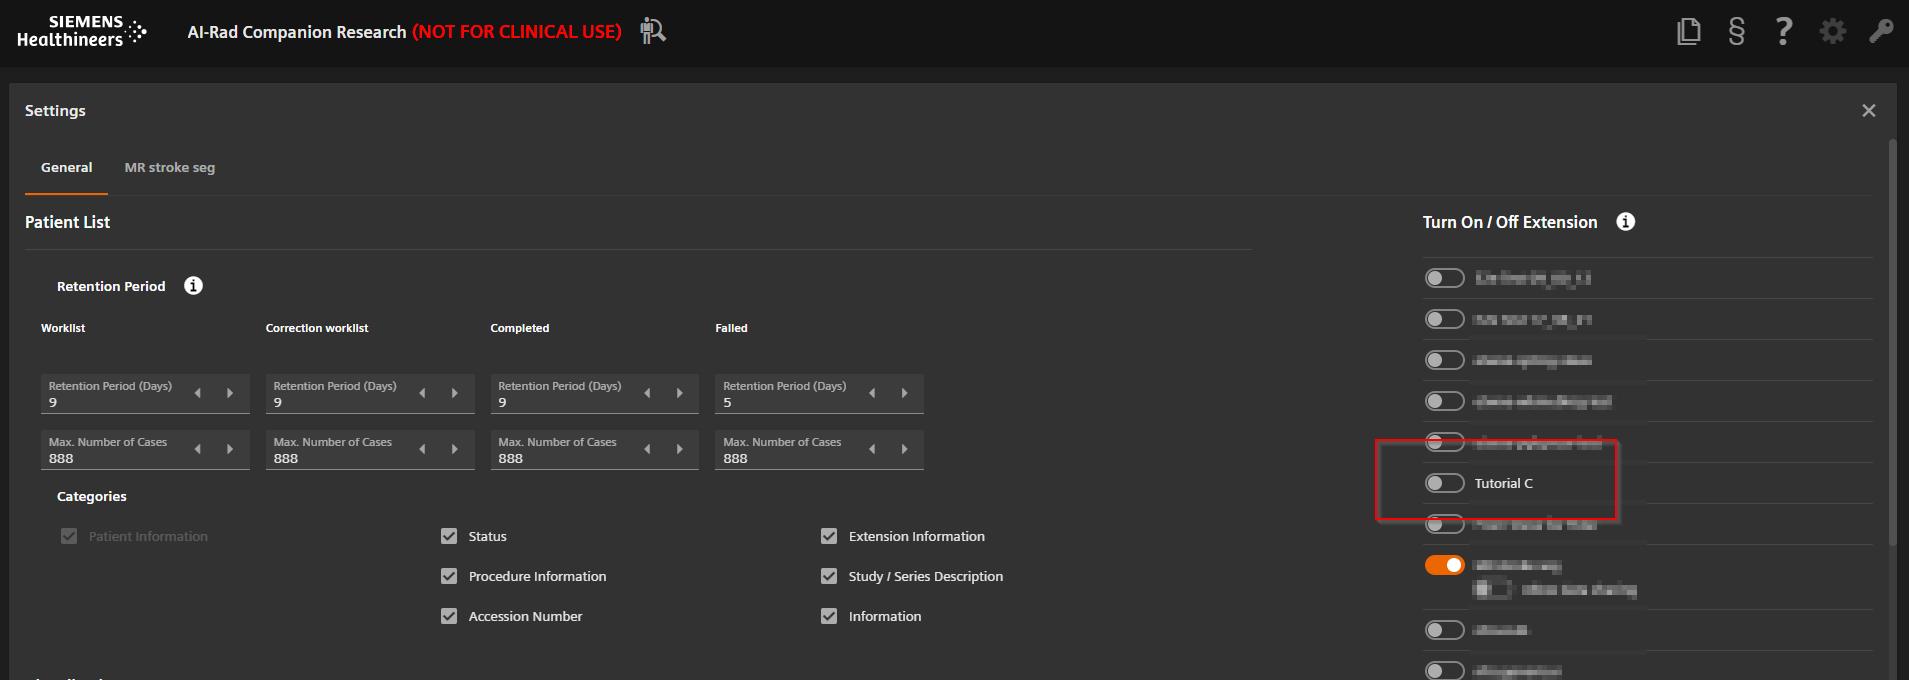 Find the "Tutorial C" app and enable it. Disable all the other apps for now. Do not worry about the "Allow data sharing" option at this time.
- Obviously, when, at a later point in time, also other environments are supported, you need to login to the respective other environment instead of the Sandbox environment.
- In order to enable a teamplay institution for "AIRC Research Frontier", the AI_RAD_RESEARCH_FRONTIER_EXTENSION license (in addition to AI_RAD_RESEARCH_ENGINE license) needs to be granted as well as the corresponding feature flags (at the time of writing the feature flags are granted automatically). More details will be provided.
Step 9: Test deployed app
To test our prototype we will use "teamplay DICOM Hub" to upload and send a DICOM image to our app and receive the result back. Remember, the result should be a rotated version of the input image.
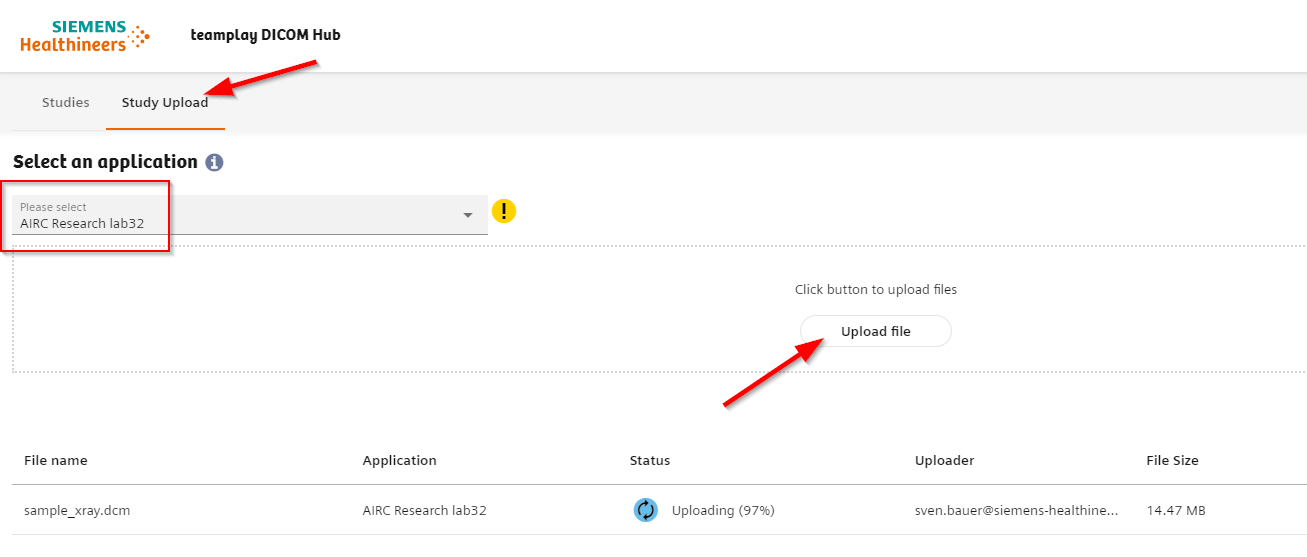
Upload the example image from the provided ZIP file (see above) and upload it to "teamplay DICOM Hub". Make sure that you select "AIRCResearch lab32 WEU" as the target application already during upload:
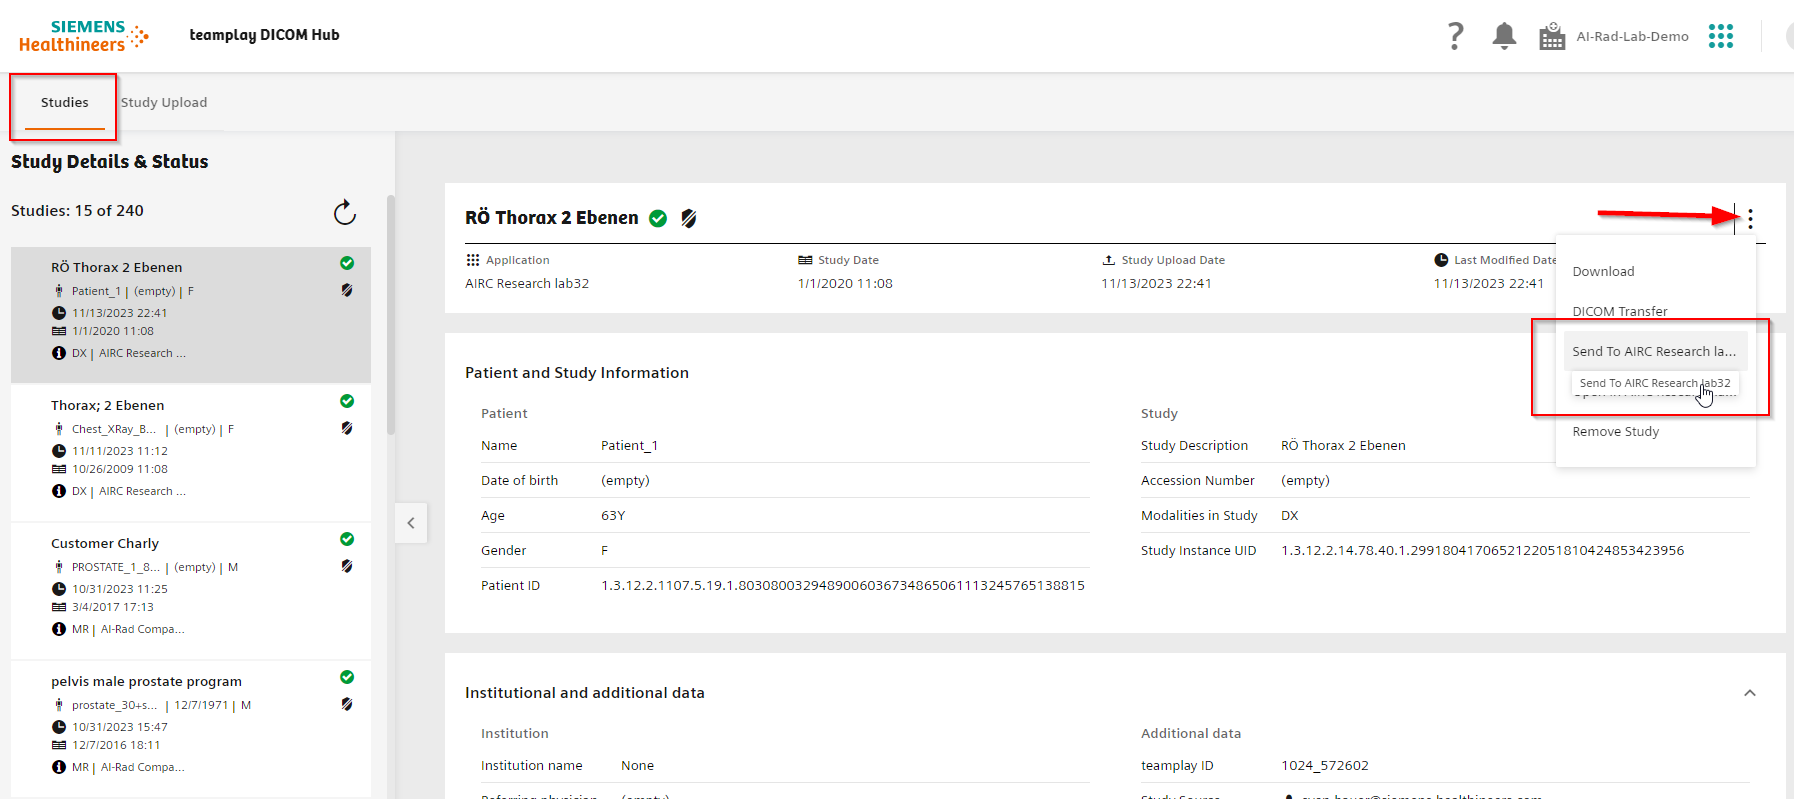
After uploading the image should be visible in the "All Studies" section and can be send to "AIRCResearch lab32 WEU":
After some time the case should become visible in the AIRC Research "Queued" list:

And after some more time, the case should be finished processing and moved to the "Completed" list. The results would than be visible in the "teamplay DICOM Hub" again:


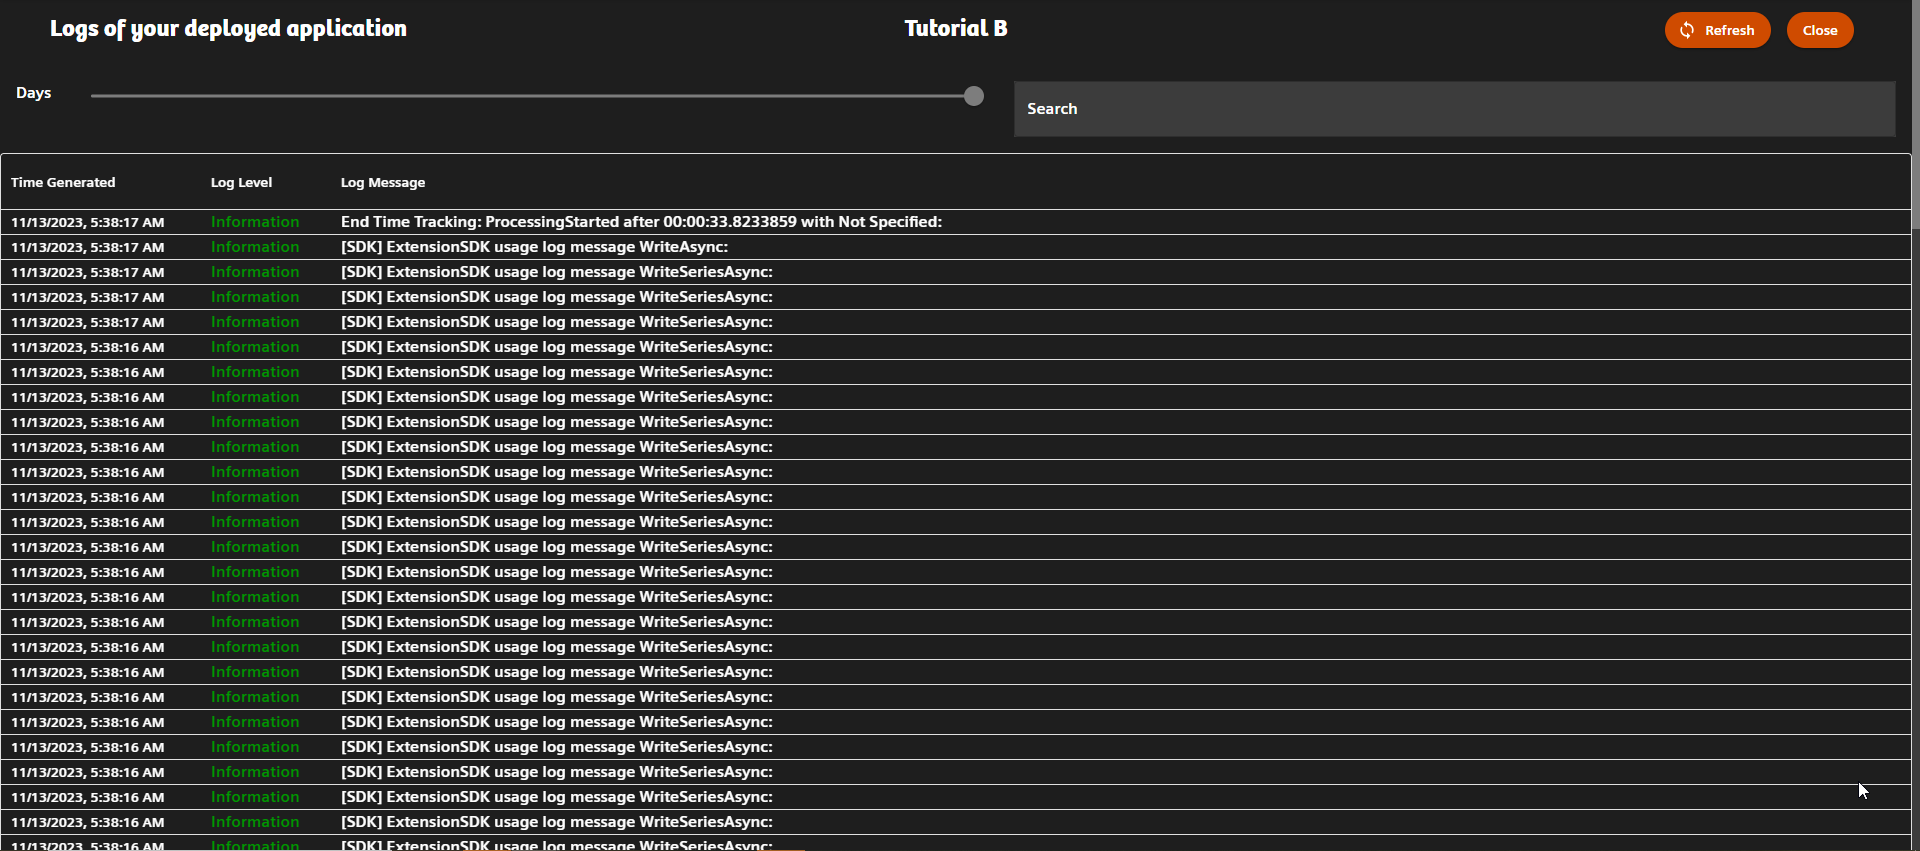
Step 10: Have a look at the logs
The developer portal gives you the opportunity to access the logs related to your prototype. However, currently this is only possible for the "AIRC Research" cloud deployment. For the Open Apps deployment, you need to get the logs directly from the system or via SRS.
In order to access the logs go to the deployment section of the application. Click the button for the respective deployment and select the "Application Logs" entry:
Congratulations, you have successfully finished the self-onboarding of your first Python-based app using the Frontier developer portal!
